As the camper shell was not high enough for me to stand-up, I decided that I would raise the center section.
Why only the center section? Two reasons:
1/ Make the truck less suceptible to side wind
2/ It will create a nice area to place the awning later.
First task is to carefully measure and cut an opening, keeping in mind that the sections removed will be re-used later, further up...
Yes, the "hole" is NOT centered! This is on purpose: There will be top cupboards only on one side.
To keep the sidewalls from moving, I momentarily inserted a wooden plank to keep them aligned.


Notice here, there are two types of boards:
1/Green (horizontal) is the "original" Nidaplast (honeycomb)
2/ White (sloping) is the new "GRP/SCS" I ordered (better for insulation, but expensive!)
Second panel is positionned and bonded to first one using matt and fiberglass
=> Here a first layer has been set, I'm about to put a second layer, later a third layer will be set, each layer of matt being wider than the previous one.


Why only the center section? Two reasons:
1/ Make the truck less suceptible to side wind
2/ It will create a nice area to place the awning later.
First task is to carefully measure and cut an opening, keeping in mind that the sections removed will be re-used later, further up...
Yes, the "hole" is NOT centered! This is on purpose: There will be top cupboards only on one side.
To keep the sidewalls from moving, I momentarily inserted a wooden plank to keep them aligned.

Wood struts where then positionned to strenghten the existing roof while working on it

Two folded alumimium pieces are then glued to the sloping roof, straps overnight...

Then the front, slopping part is glued in, straps overnight...

The two sides, with temporary white boards holding them at the correct angle, glued and strapped overnight...


Bottom part of back end is glued and protected from rain overnight...


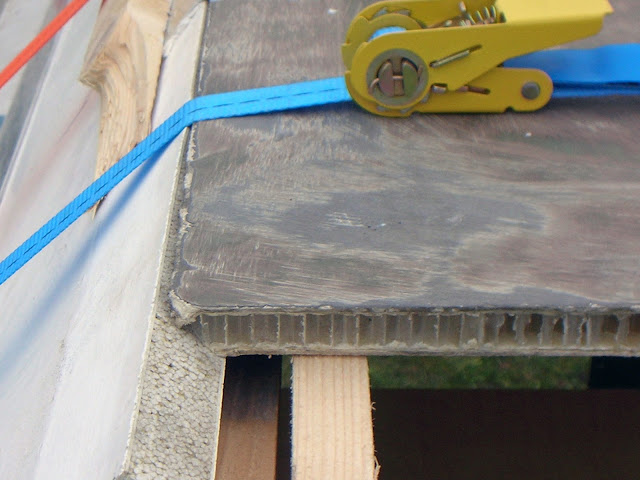
First portion of roof (back part) is now set, glued and strapped overnight

Notice here, there are two types of boards:
1/Green (horizontal) is the "original" Nidaplast (honeycomb)
2/ White (sloping) is the new "GRP/SCS" I ordered (better for insulation, but expensive!)

Second panel is positionned and bonded to first one using matt and fiberglass
=> Here a first layer has been set, I'm about to put a second layer, later a third layer will be set, each layer of matt being wider than the previous one.

Sides of second panel (towards the front of truck) are then glued

Miscellaneous pices of aluminium are then postionned where they should go to complement all joints


Joints are carefully cleaned and "liquid alimunium" used to fill the cracks


Well... we are getting there...

Time to work inside!
Glue, 90° GRP strips at back of truck (this area will become a storage space)

Because of slant, glue aluminium inserts towards the front

This is what the inside looks like after all this long, hard work is done!

Talking of hard work, I completely wore out a glue gun and many pairs of work gloves...


Winter has arrived, time to stop for this year!
... Oh, the joys of working outside...
